Redken Ambassador and Salt Society Education Founder Jamie Sea (@prettylittleombre) is constantly churning out high wattage blonde nonstop. Just creep her Instagram feed as proof. She performs as many as 40 blonde color jobs a month, producing the most envious of high lift results with exceptional blendwork. “Most guests want to achieve the brightest result possible, and classic balayage will give a more gentle lift with a warm finish whereas foilyage can achieve up to seven levels of lift in one session,” says Sea. “Foilyage is intended to mimic a hand painted balayage with the goal of creating a gradient from root to end. The rooty effect is very popular because it’s low maintenance for guests.” Check out how she used a foilyage technique to create a beautiful and bright balayage effect on this blonde.
Products Used:
10 Vol Wella Blondor
20 Vol Wella Blondor
Ones to Try:
Redken Blonde Idol Flash Lift
Matrix Light Master Lightening Powder
L’Oréal Professionnel Blonde Studio Multi-Techniques Powder
Redken Shades EQ 1/2oz 5NW + 1/4oz 6T (for root smudge)
Redken Gloss 9T and 9NB equal parts (on ends)
The Paint Pack by prettylittleombre
Perforated Film
Product Club foils
Step-by-Step:
- Section hair into six sections parted behind the ear, diamond-shaped parting on crown, two sections below diamond shaped section from temple to temple side sections.
- Starting at the bottom, foil one microfoil around the base.
- Take a subsection of hair that is left unfoiled to ensure dimension is left within the hair.
- Take fine sections and tease from bottom of strand to base, apply lightener to ends of hair and feather upward.
- Repeat subsection and foiled teasy light on both bottom sections.
- Once you reach the diamond shape on the crown of the head, begin taking larger subsections to make sure that the hair has more depth. This is allows for the brighter pieces to really pop.
- As you approach the side sections, alternate between unfoiled section, slice, unfoiled section, and weave.
- The top crown area is created using teasy lights with minor subsections to ensure maximum brightness.
- Right around the hairline, create three back to back weaved highlights
- Lighten to level 10 then rinse.
- Apply root smudge leaving hairline out until very end.
- Take a Wet Brush and blend into zone two using a "c motion."
- Let sit for 5-10 minutes before adding zone two-three gloss.
- Add end gloss.
Pro Tip:
Apply product from mid-section to ends, and then feather upwards so you don’t end up with any hard lines. This specific color application took about 40 minutes to apply. Make sure you have enough time built into your appointments for application.
View the full tutorial here.
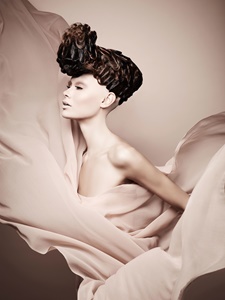
Photo Credit: Courtesy of Instagram/@prettylittleombre


.png?mw=300&mh=300&as=1)