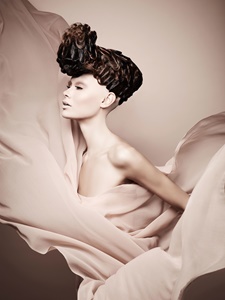
Let the festival hair games begin! It’s that time of year again where Coachella, Lollapalooza, Bonaroo, Governor’s Ball and Glastonbury flood your feeds with nonstop, double tap-worthy looks. With eye-catching, creative hairstyles keeping heads turning and the camera lenses snapping, there’s no shortage of inspo. We’re catching up with the artists on the front lines of festival hair, all season long.
Stephanie Hodges @stephhstyles
#ItTakesAProTeam/Pulp Riot Artist

Courtesy of Stephanie Hodges/@stephhstyles
Trends To Watch
I love festival season because it showcases my favorite.....BRAIDS! All kinds of braids, from simple to complicated, will be hot this season. We should also be seeing a ton of hair accessories happening. For example, I love wrapping my braids with wire or a bit of silver stretchy elastic. Adding fun clips, bobby pins and scarves to a style can create interest that will have people turning heads.

Courtesy of Stephanie Hodges/@stephhstyles
Favorite Festival Look Ever
I love when I can integrate a combination of techniques into a look. One of my favorite festival styles was on my guest, Rachel. After coloring her with Pulp Riot color, I created a fun ponytail hybrid for her.
Get The Look
1. Before taking your first section, spray Pulp Riot’s Berlin Dry Shampoo onto the base of the hair and throughout the mids and ends. This will do two things: proactively protect the hair from oils and sweat, and create a texture for when you need to pinch and pull out each section.
2. Now take your top section from each side using the arch of the eyebrow as your guide, and secure with an elastic just past the crown of the head.
3. Pinch and pull the section just a little to give it a loose feel without the need to backcomb.
4. The next section will be from each side sliding back from ear to ear. Secure this section with an elastic.
5. Within these two elastics you will create your first bubble. To do this, hold the bottom elastic and gently pull all around it until you achieve the size you want.
6. Gather the rest of the hair at the base of the neck and secure with an elastic.
7. Create the second bubble as instructed above.
8. Now that all the hair is secure, you can start to create the infinity braid. As with all braids, it is repetitive. Divide the pony into two sections, holding a section in each hand. Take a small slice of hair from the section in your right hand. This will be your traveling piece. Direct it over the right section and under the left section; back over the left and under the right. Over, under, over, under using that same traveling piece. You are creating a figure 8.
9. When the traveling piece gets to about 2 inches from the ends, take a new, small slice from either side and combine it with your piece. Continue your over, under, over, under until you reach the desired length. Secure with an elastic.
10. With the remaining hair create two more bubbles, securing each section with an elastic, and gently pulling the bubble out until you achieve your desired shape.


.png?mw=300&mh=300&as=1)